Analyze OMERO data using QuPath
Description
QuPath is a cross-platform software application designed for bioimage analysis - and specifically to meet the needs of whole slide image analysis and digital pathology. See http://qupath.readthedocs.io/.
We will show:
How to connect QuPath to OMERO.server and browse the data.
How to open an image including ROIs from OMERO.server in QuPath.
How to draw an Annotation in QuPath and save it on an image in OMERO as OMERO ROI.
How to perform simple Cell detection in QuPath.
How to save the Cell detection ROIs directly to OMERO using a script in QuPath.
How to export the Cell detection ROIs from QuPath as OME-XML.
How to import the OME-XML to the OMERO.server and attach the QuPath ROIs to the original image in OMERO.
Resources
Data: example images from
IDR project referenced as idr0018. Note that the data also have been imported into an OMERO.server where the possibility to write ROIs/annotations exists (not the IDR server itself). See the
Step-by-stepsection for further details.
Video showing the usage of the QuPath OMERO extension
QuPath documentation describing the QuPath OMERO extension.
Plugin
ome-omero-roitoolv0.2.4 for import and export of ROIs to or from OMERO using OME-XML format. Theome-omero-roitool-xxx.zipunder Releases also contains the scripts for export and import of ROIs from/to QuPath in OME-XML format. For precise installation steps, see below theStep-by-stepsection.
Step-by-step
Opening images with ROIs from OMERO in QuPath
You can go through this workflow directly using the Images from the IDR. Nevertheless, as you cannot write any data directly into IDR during your analysis, you will not be able to successfully import the resulting Annotations and ROIs back into the OMERO in IDR. Thus, you might consider using another OMERO.server which you can write data to and upload this or another RGB large image into it.
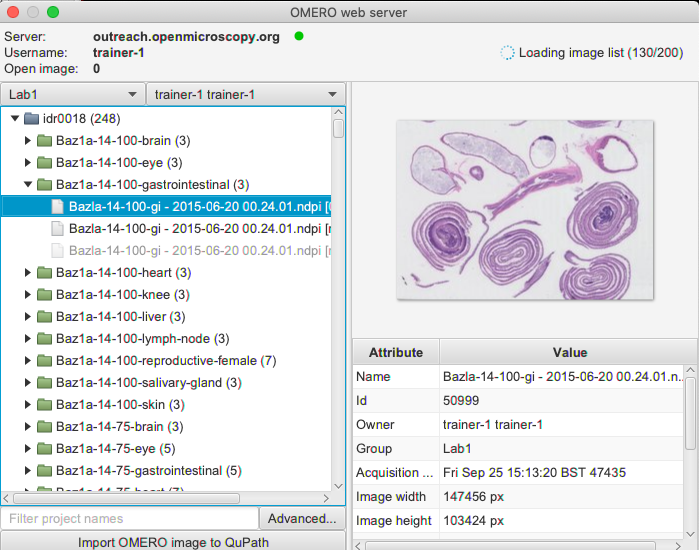
In OMERO.web, identify an image in the idr0018 project and the dataset
Baz1a-14-100-gastrointestinalcontained in that project.Select the first image and double-click on it. This will open the image in OMERO.iviewer, in a new tab of your browser.
If on a read-write OMERO server (i.e. not IDR), you can draw and save some ROIs on that image in OMERO.iviewer to be able to open them in QuPath later below, see OMERO.iviewer guide for how to do it.
Start your locally installed QuPath. Create a new QuPath Project by creating a new empty folder on your machine and dropping this new folder into the main QuPath window. Answer
Yeswhen prompted.Create a connection to your OMERO server by clicking
Extensions > OMERO > Browse server > New serverand paste into the dialog a valid server url including thehttporhttpsmotives, for examplehttps://<server>.com. Details are described in the Browsing an OMERO server chapter of the QuPath documentation.Once connection to the server is established, QuPath will pop up a new dialog. In this dialog, select the correct group in OMERO in top left corner and the correct user. Expand Projects and Datasets as necessary, selecting the image with ROIs which you worked on in previous steps.
Double click on the image in the tree. In the new window, select the image again in the
Image pathslist, check theImport Objectscheckbox and clickImportin bottom-right corner.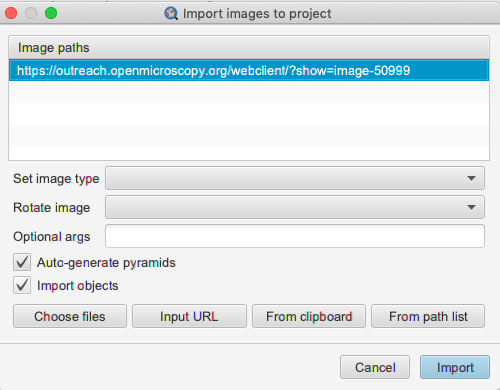
Click on the imported image in your QuPath project to open it in QuPath. Inspect the ROIs imported from OMERO.
To draw new ROIs or annotations in QuPath, find a region with well-defined cells and nuclei in the image, zoom in.
Draw an
Annotationwhich denotes the region in which the cells will be detected using theWandtool .
.Select the
Annotationstab, select the class from the list to the right (e.g.Stroma) and clickSet class. ClickExtensions > OMERO > Send annotations to OMERO. A dialog will inform you how many ROIs are to be saved. ClickOK.Go to OMERO.iviewer, refresh the image and verify that the annotation was saved as an OMERO ROI (polygon).
Note that there is some loss of metadata when going through the
Extensions > OMERO > Send annotations to OMEROstepThe Class of the
Annotationin QuPath will be indicated only by a fill color of the ROI in OMERO. If you reopen the image in QuPath again from OMERO, the ROI fetched by QuPath from OMERO will have the correct name of theAnnotationif you gave it one in QuPath, but both the Class as well as theAnnotationcolor will be lost by the round trip to OMERO and back.All the holes in your
Annotationwill be ignored (filled in), as theAnnotationis translated into a polygon ROI in OMERO. The ROI in OMERO will appear as a filled-in object, as shown in the cartoon in the Send objects back to your OMERO server chapter of the QuPath documentation.The “derived” ROIs which were created for example by Cell detection algorithm in QuPath will be ignored when saving
Annotationsto OMERO. To save them either Save detection ROIs using QuPath script or ome-omero-roitool workflows can be used.
Saving of derived ROIs from QuPath to OMERO
The QuPath plugin for OMERO described above allows saving of the Annotations drawn in QuPath to OMERO, but it does not enable the saving of “derived” ROIs, such as Cell detection ROIs. To save the Cell detection ROIs either Save detection ROIs using QuPath script or ome-omero-roitool workflows can be used.
Save detection ROIs using QuPath script
Warning
The feature described in Save detection ROIs using QuPath script was not really designed for saving large amounts of ROIs (thousands) back to OMERO. An attempt to save large amounts of ROIs might result in slow performance or other problems.
Connect QuPath to OMERO, open an image from OMERO in QuPath and draw an
Annotationon it as described in Opening images with ROIs from OMERO in QuPath.Adjust your
Annotationusing theBrushtool .
.Select
Analyze > Cell detection > Cell detection.You can adjust the parameters. Click
Run. This will draw red ROIs around cells and nuclei inside yourAnnotation.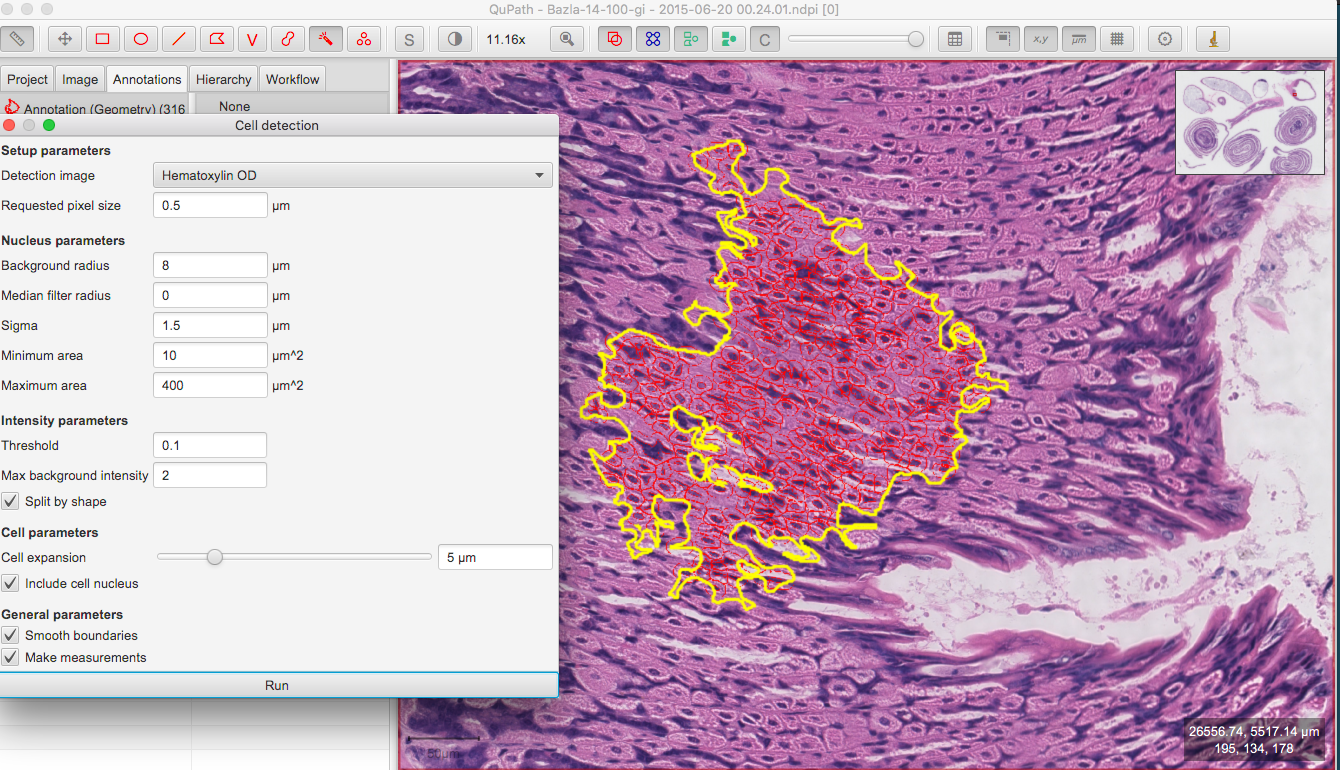
Click on
Hierarchytab in the left-hand pane of QuPath. Expand theAnnotationyou have just run theCell detectionon.Select several detection ROIs.
Open the scripting dialog in QuPath
Automate > Script editorand paste into it the following code:import qupath.lib.images.servers.omero.OmeroTools OmeroTools.writePathObjects(getSelectedObjects(), getCurrentServer())
Click
Run. This saves the detection ROIs you selected in theHierarchytab into OMERO.Go to OMERO.iviewer and refresh the image. Inspect the saved detection ROIs.
Save detection ROIs using ome-omero-roitool
This workflow necessitates the usage of the Command Line Interface. The limitation here are the Annotation ROIs, which are transformed into masks in OMERO. Although this preserves the holes in the Annotations, if the Annotation ROIs are too large, it might result in performance problems or even running out of resources on the machine where the export of the mask from QuPath is attempted.
Connect QuPath to OMERO, open an image from OMERO in QuPath and draw an
Annotationon it as described in Opening images with ROIs from OMERO in QuPath.Adjust your
Annotationusing theBrushtool.Select
Analyze > Cell detection > Cell detection.You can adjust the parameters. Click
Run. This will draw red ROIs around cells and nuclei inside yourAnnotation.Use the ROI OME-XML export script to export your ROIs from QuPath into OME-XML file. Find the version of
ome-omero-roitoolmentioned in Resources on ome-omero-roitool releases and from there download theome-omero-roitool-xxx.zip. The downloaded zip contains both the plugin and the QuPath scripts needed for this workflow.Unzip the downloaded artifact and drag and drop the
OME_XML_export.groovyinto your QuPath.To run the script, select
Run > Run.Note: If you run a
Cell detectionin QuPath, the nuclei ROIs will be drawn as well as the ROIs around the cells. The ROI OME-XML export script will export both the ROIs around the cells as well as the nuclei ROIs.Import the OME-XML with the ROIs from QuPath into OMERO. These steps must be run on a command line.
Open your terminal window and
cdinto the directory containing theome-omero-roitool-xxxfolder downloaded in previous steps, then run:cd ome-omero-roitool-xxx cd bin
On Mac or Linux, run:
./ome-omero-roitool import --help
On Windows, run:
ome-omero-roitool.bat import --help
The
--helpoption will give you a helpful output about how to construct the import command.In the command below, replace the
$IMAGE_IDparameter with the ID of the image in OMERO. You can obtain this ID for example from OMERO.iviewer (see beginning of this workflow).To achieve the import of the ROIs to OMERO, you can run:
./ome-omero-roitool import --password $PASSWORD --port 4064 --server $SERVER --username $USERNAME $IMAGE_ID $PATH/TO/OME-XML/FILE
Note: if you are using websockets, set the port to
443and the server with the protocol e.g.wss://outreach.openmicrocopy.org/omero-ws.After you executed the
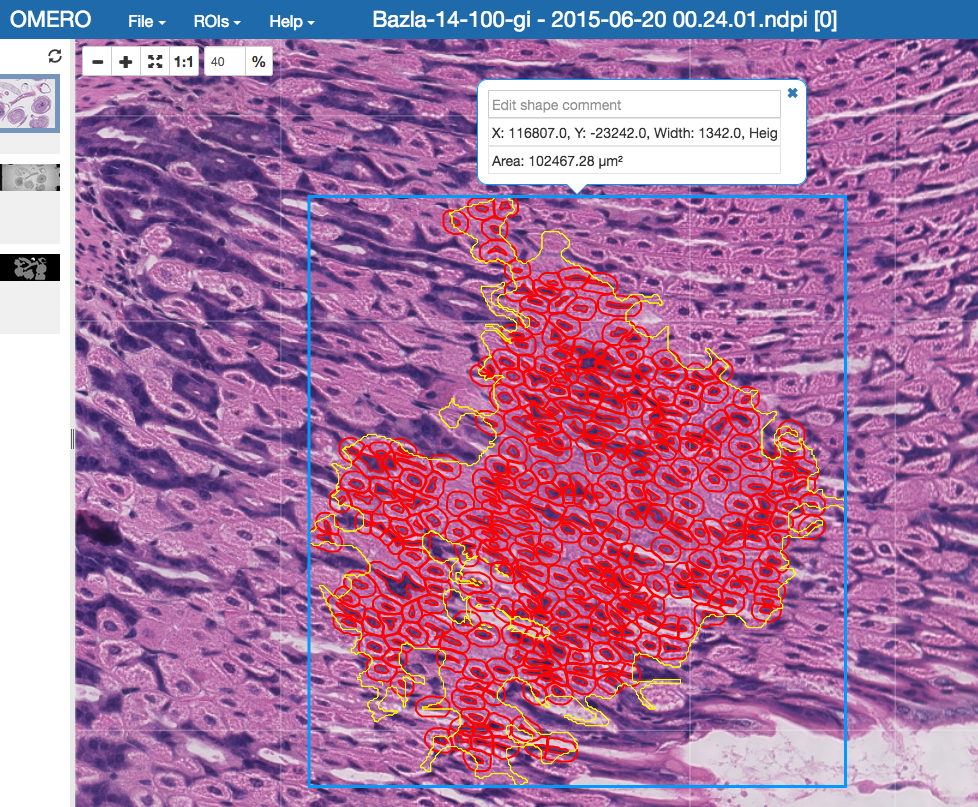
importcommand above, go to OMERO.iviewer in your browser and view the ROIs on the image. TheAnnotationfrom QuPath is displayed as a mask ROI in OMERO.iviewer (the yellow ROI in the screenshot below). Masks cannot be edited in OMERO.iviewer at the moment, but they can be viewed. The mask, when selected displays a blue bounding box around theAnnotationon the image.