Crop and import
Description
The following workflows should work both with ImageJ and Fiji, after these have been correctly set up with the OMERO plugin for Fiji/ImageJ.
Using the User Interface of the OMERO plugin, we will show:
How to connect to OMERO using the OMERO plugin for ImageJ/Fiji.
How to open an image from OMERO.server into Fiji/ImageJ.
How to import the cropped image from Fiji/ImageJ into OMERO.
Setup
Install Fiji on the local machine with the OMERO.insight-ij plugin. The installation instructions can be found at How to install OMERO plugins for Fiji/ImageJ.
Resources
Samples images from the Image Data Resource (IDR) idr0021.
Step-by-step
In this example, we show how to open an OMERO image, crop the image and import the cropped image back to OMERO as OME-TIFF.
Launch Fiji/ImageJ.
Go to Plugins > OMERO > Connect To OMERO. This will show a login screen where you can enter the name of the server to connect to, the username and password. The OMERO plugin will allow you to browse your data in a similar manner to OMERO.web.
In the OMERO login dialog, click the wrench icon
 and then
add the server address in the dialog. By default, only “localhost”
is listed. Click on the plus icon to add a new line to the list
and type into the line the server address.
and then
add the server address in the dialog. By default, only “localhost”
is listed. Click on the plus icon to add a new line to the list
and type into the line the server address.Click Apply.
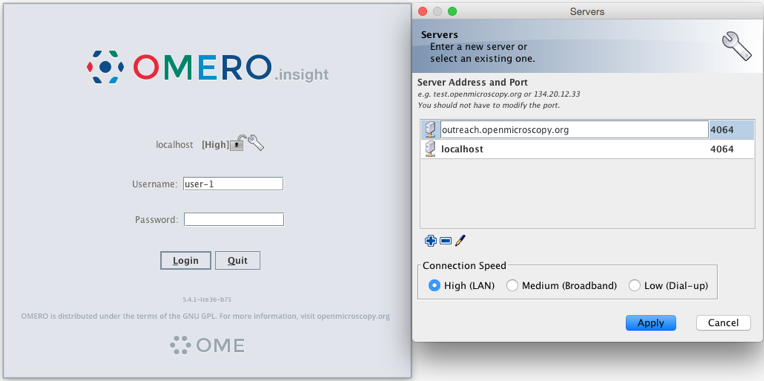
Enter your credentials and click Login.
Select a dataset, for example the A-Fiji-dataset Dataset.
Double-click on a thumbnail or on an Image in the left-hand tree to open an Image in Fiji/ImageJ.
Draw a Rectangle on the Image.
Select the option Image > Crop.
A new Image will be displayed in a Fiji/ImageJ window.
Go to Plugins > OMERO > Save Image(s) To OMERO.
An Import dialog will pop up.
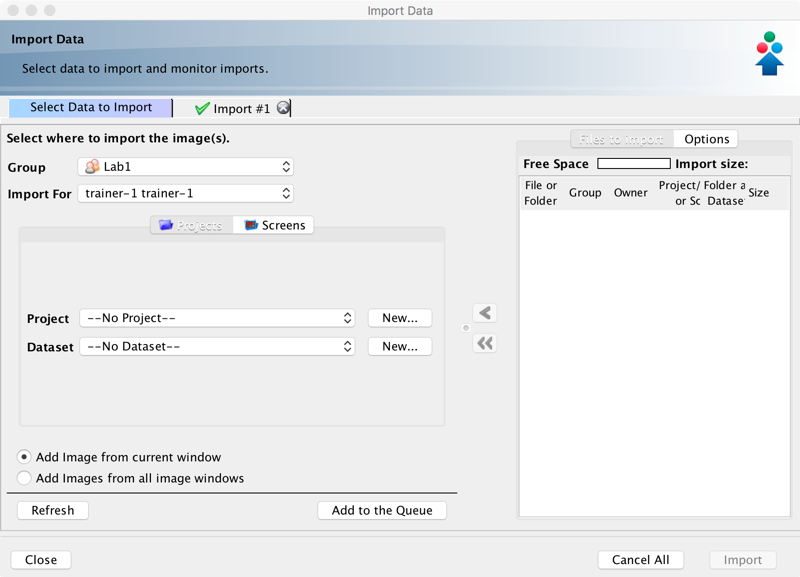
Check that the option Add Image from current window is selected.
Select where to import the cropped Image, for example an existing Dataset, e.g. A-Fiji-dataset. You can also select New From Folder option which will create a new Dataset named with the name of the image you opened from OMERO to Fiji. In case you select No Dataset option, the new image will be displayed in the Orphaned Images folder in OMERO.
Click Add to the Queue button.
Then click Import. The import will start.
When the import is done, go back to the Tree view in the Fiji plugin or OMERO.web. Refresh. Check the new Image.