Use ImageJ in Python
Description:
This section shows how to use ImageJ as a Python library to analyze data in OMERO.
Using the Python API allows us to easily load the 2D-plane we need to see or analyze. This is much easier than using the Java API and Bio-Formats plugin.
We will show in the examples:
- How to start ImageJ in Python.
- How to load data from OMERO.
- How to run ImageJ macro from Python.
Setup
For using the Python examples and notebooks of this guide we recommend using Conda (Option 1). Conda manages programming environments in a manner similar to virtualenv.
Alternatively you can use repo2docker to build and run a Docker image locally (Option 2).
This Docker image will provide the Conda environment and Jupyter notebooks with some image
analysis workflows.
Option 1
Install omero-py and pyimagej via Conda:
Install Miniconda if necessary.
Create a programming environment using Conda and activate it:
$ conda create -n imagej_python python=3.6

$ conda activate imagej_python
Install omero-py and pyimagej:
$ conda install -c conda-forge pyimagej

$ conda install -c ome omero-py
Note: we have noticed problems using the Option 1 approach when running the scripts on some operating systems due to issues with the ImageJ1-ImageJ2 bridge.
Option 2
Create a local Docker Image using repo2docker, see README.md:
$ pip install jupyter-repo2docker
$ git clone https://github.com/ome/omero-guide-fiji.git
$ cd omero-guide-fiji
$ repo2docker .
When the Image is ready:
Copy the URL displayed in the terminal in your favorite browser
Click the
Newbutton on the right-hand side of the windowSelect
Terminal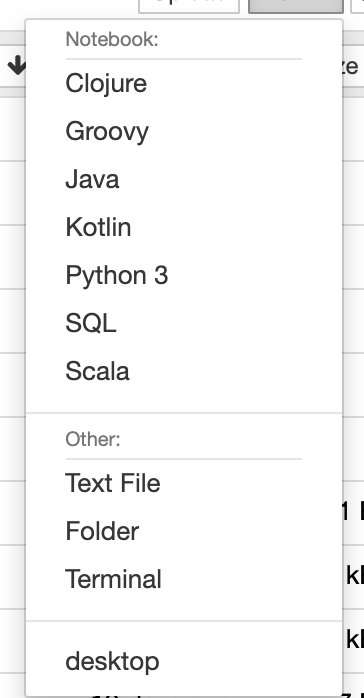
A Terminal will open in a new Tab
A Conda environment has already been created when the Docker Image was built
To list all the Conda environments, run:
$ conda env list
The environment with the OMERO Python bindings and a few other libraries is named
notebook, activate it:$ conda activate notebook
Step-by-Step
The script used in this document is run_macro_python.py.
One of the advantages of this approach is that we can load only the 2D-planes we wish to analyze.
The script used in this document contains an ImageJ1 macro that needs graphical user interface (GUI) elements, and thus it requires using ImageJ in GUI mode. In this GUI mode, the resulting windows content is handled.
If you are running the example in the Docker container,
you will also need to start UI environment if it is not already up.
If you have used the Option 2 above, select desktop to start the UI environment.
If you are using the Option 1 above, you will first need to update the script to point to your local installation of Fiji or use one of the options described in ImageJ Tutorials.
You can now run the script. To run the script, go to the folder scripts/python and run:
$ python run_macro_python.py
If you do not use any ImageJ1 features e.g. macro, you do not need the UI environment.
Below we explain the various methods in the scripts: how to start Fiji, how to load the planes to analyze and how to run an ImageJ1 macro.
In this example, Fiji has been installed locally.
Script’s description
Import modules needed:
import imagej
from omero.gateway import BlitzGateway
Load Fiji. If you run the script locally, point to your local installation of Fiji or load Fiji “on the fly”. Note that the parameter headless has been set to False since we need the graphical user interface to run the ImageJ1 macro:
def start_fiji():
    ij = imagej.init('/srv/conda/vnc/Fiji.app', headless=False)
    ij.getVersion()
    return ij
Connect to the server. It is also important to close the connection again
to clear up potential resources held on the server. This is done in the
disconnect method:
def connect(hostname, username, password):
    """
    Connect to an OMERO server
    :param hostname: Host name
    :param username: User
    :param password: Password
    :return: Connected BlitzGateway
    """
    conn = BlitzGateway(username, password,
                        host=hostname, secure=True)
    conn.connect()
    conn.c.enableKeepAlive(60)
    return conn


def disconnect(conn):
    """
    Disconnect from an OMERO server
    :param conn: The BlitzGateway
    """
    conn.close()
Load an image from IDR:
image = conn.getObject("Image", image_id)
Load the binary plane as numpy array:
def load_plane(image):
    """
    Load a 2D-plane as a numpy array
    :param image: The image
    """
    pixels = image.getPrimaryPixels()
    return pixels.getPlane(0, 0, 0)
To be used in ImageJ, the numpy array will be converted into ImageJ types using the to_java() method.
In order the use the methods implemented above in a proper standalone script:
Wrap it all up in an analyse method and call it from main:
def analyse(ij, conn, image_id):
    # Step 3 - Load image
    image = conn.getObject("Image", image_id)
    # -
    plane = load_plane(image)
    from jnius import autoclass
    autoclass('ij.WindowManager')
    ij.ui().show('Image', ij.py.to_java(plane))
    macro = """run("8-bit")"""
    ij.py.run_macro(macro)


def main():
    try:
        hostname = input("Host [wss://idr.openmicroscopy.org/omero-ws]: \
                         ") or "wss://idr.openmicroscopy.org/omero-ws"
        username = "public"
        password = "public"
        image_id = int(input("Image ID [1884807]: ") or 1884807)
        print("initializing fiji...")
        ij = start_fiji()
        print("connecting to IDR...")
        conn = connect(hostname, username, password)
        print("running the macro...")
        analyse(ij, conn, image_id)
    finally:
        if conn:
            disconnect(conn)


if __name__ == "__main__":
    main()